NOTE :
- Please follow the steps below. If the filament
is not stuck, please start from step number 11.
- Please ensure that the printer is A: Switched off and B:
Head/Extruder cooled down !
- Reassemble via reverse process steps.
1. Remove top cover

2. Remove bottom cover

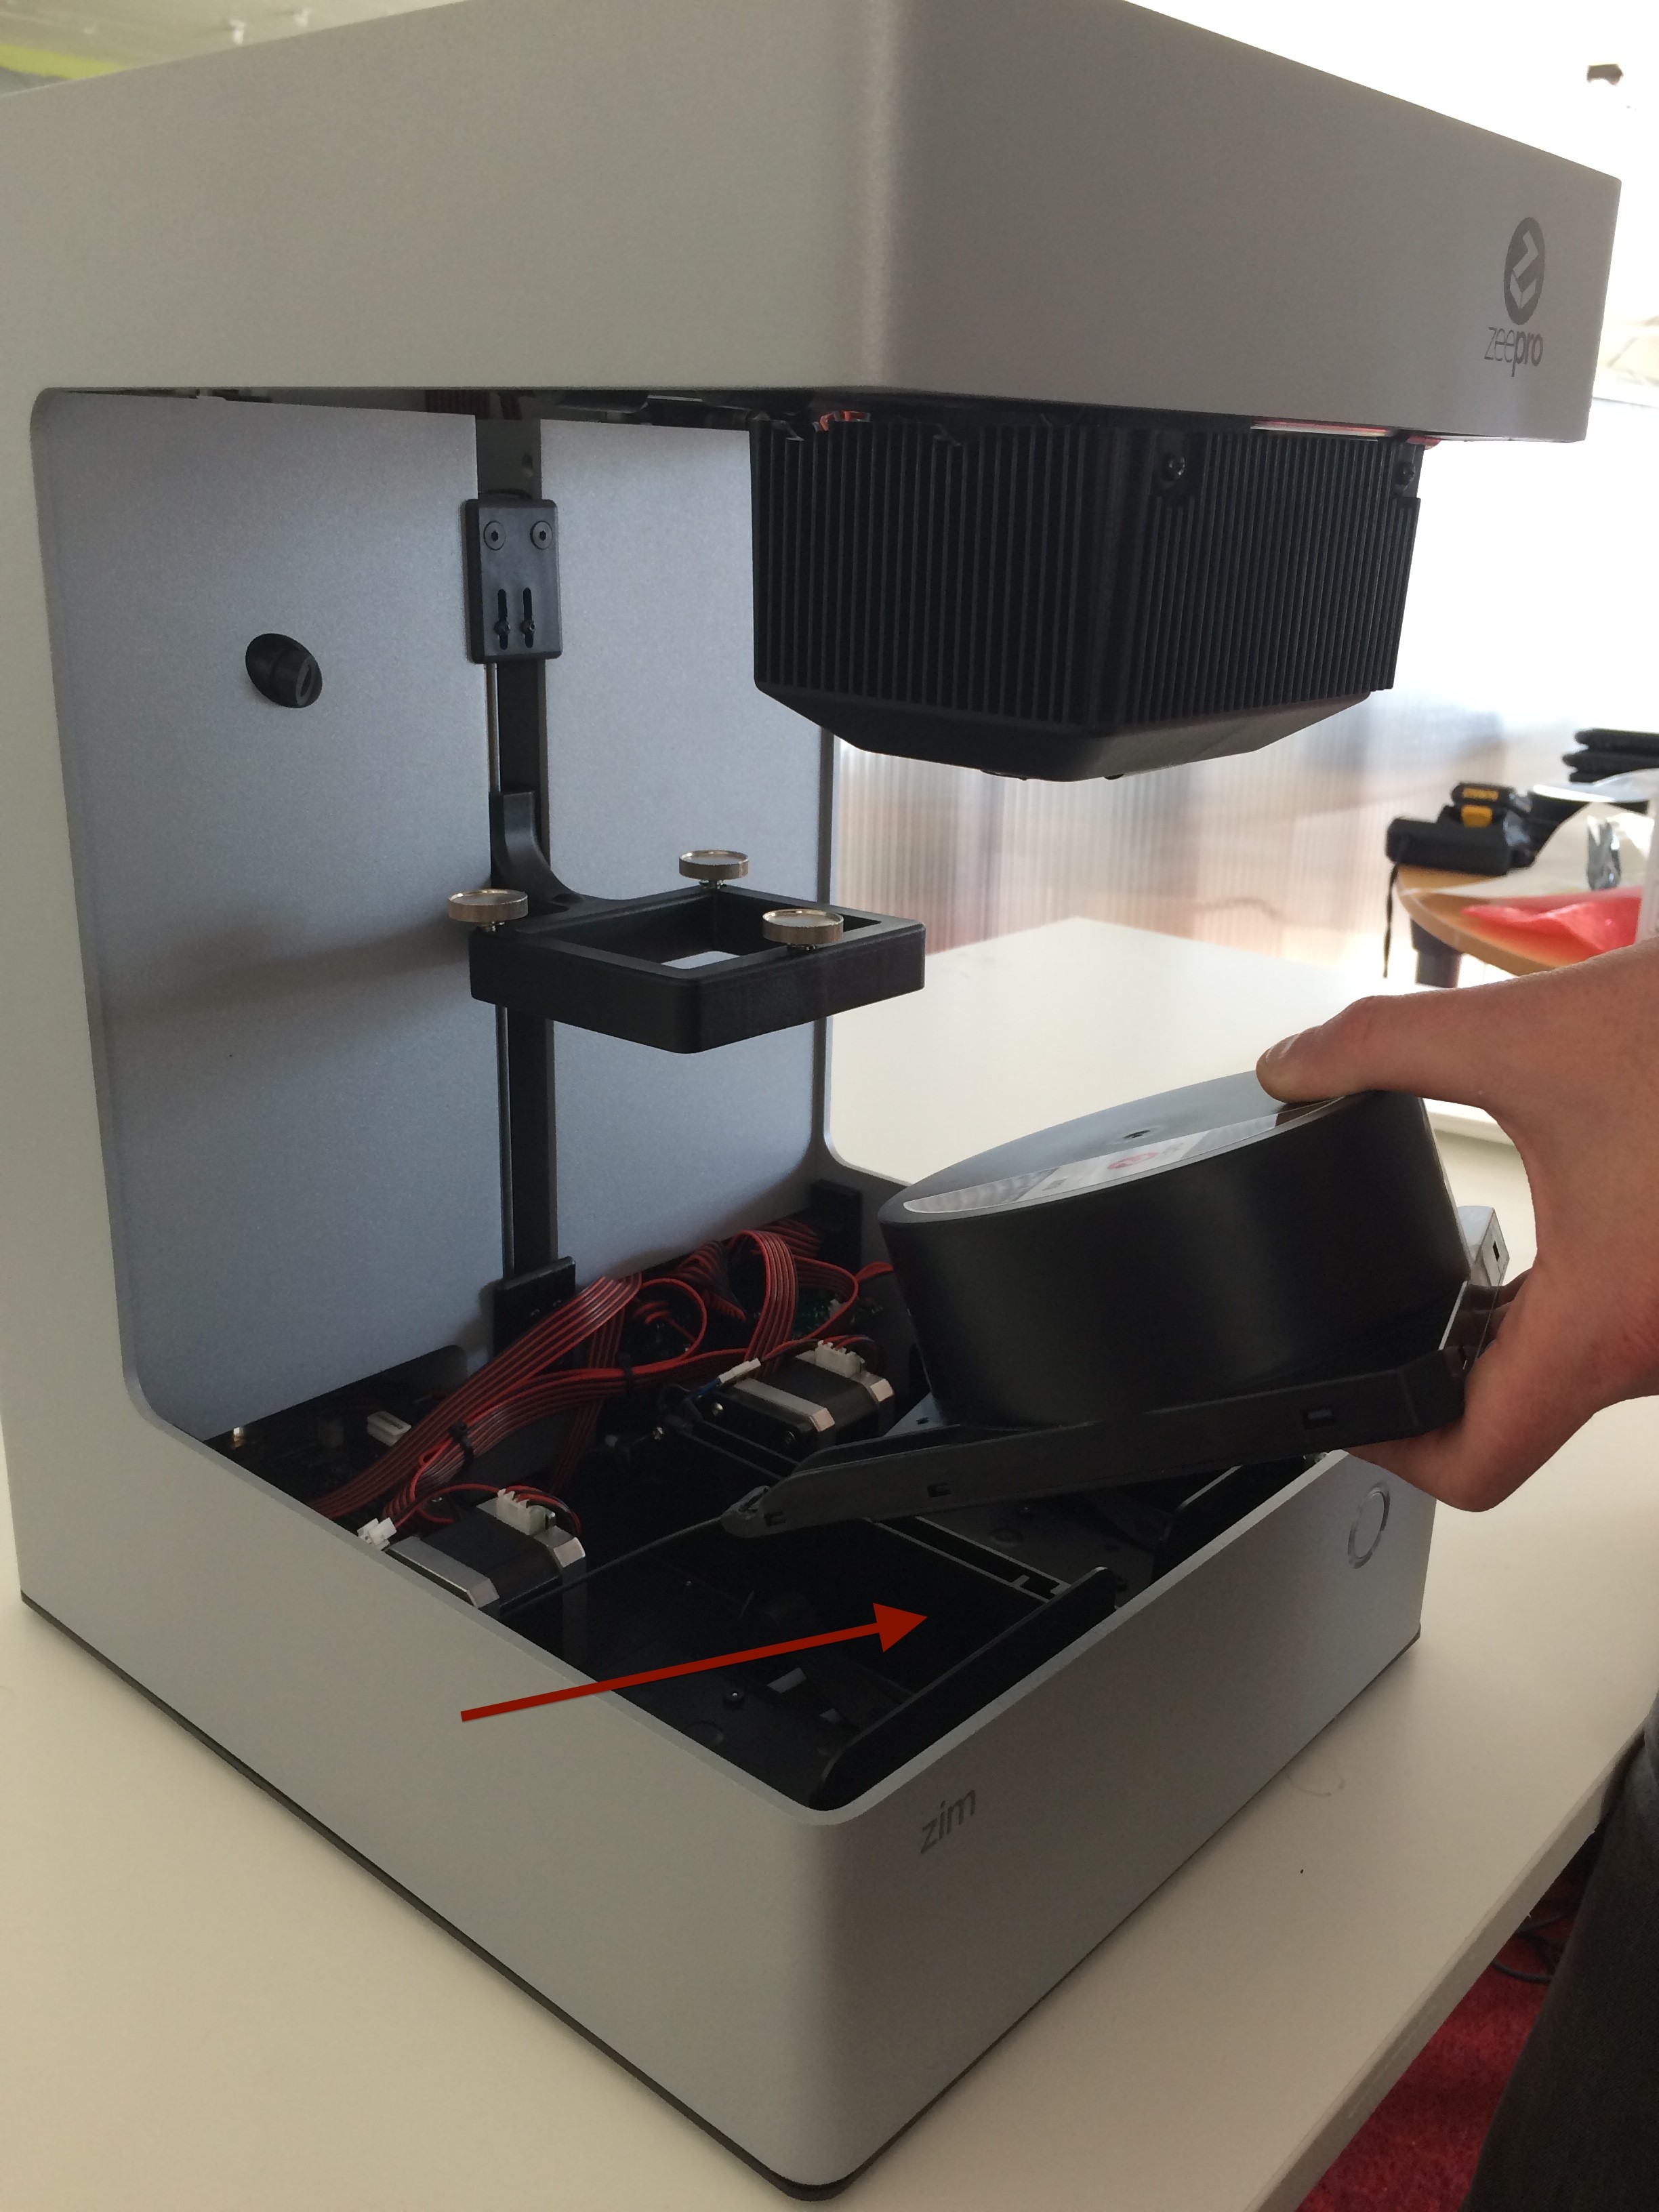
3. Pull out cartridge (slowly and careful)
4. Cut filament
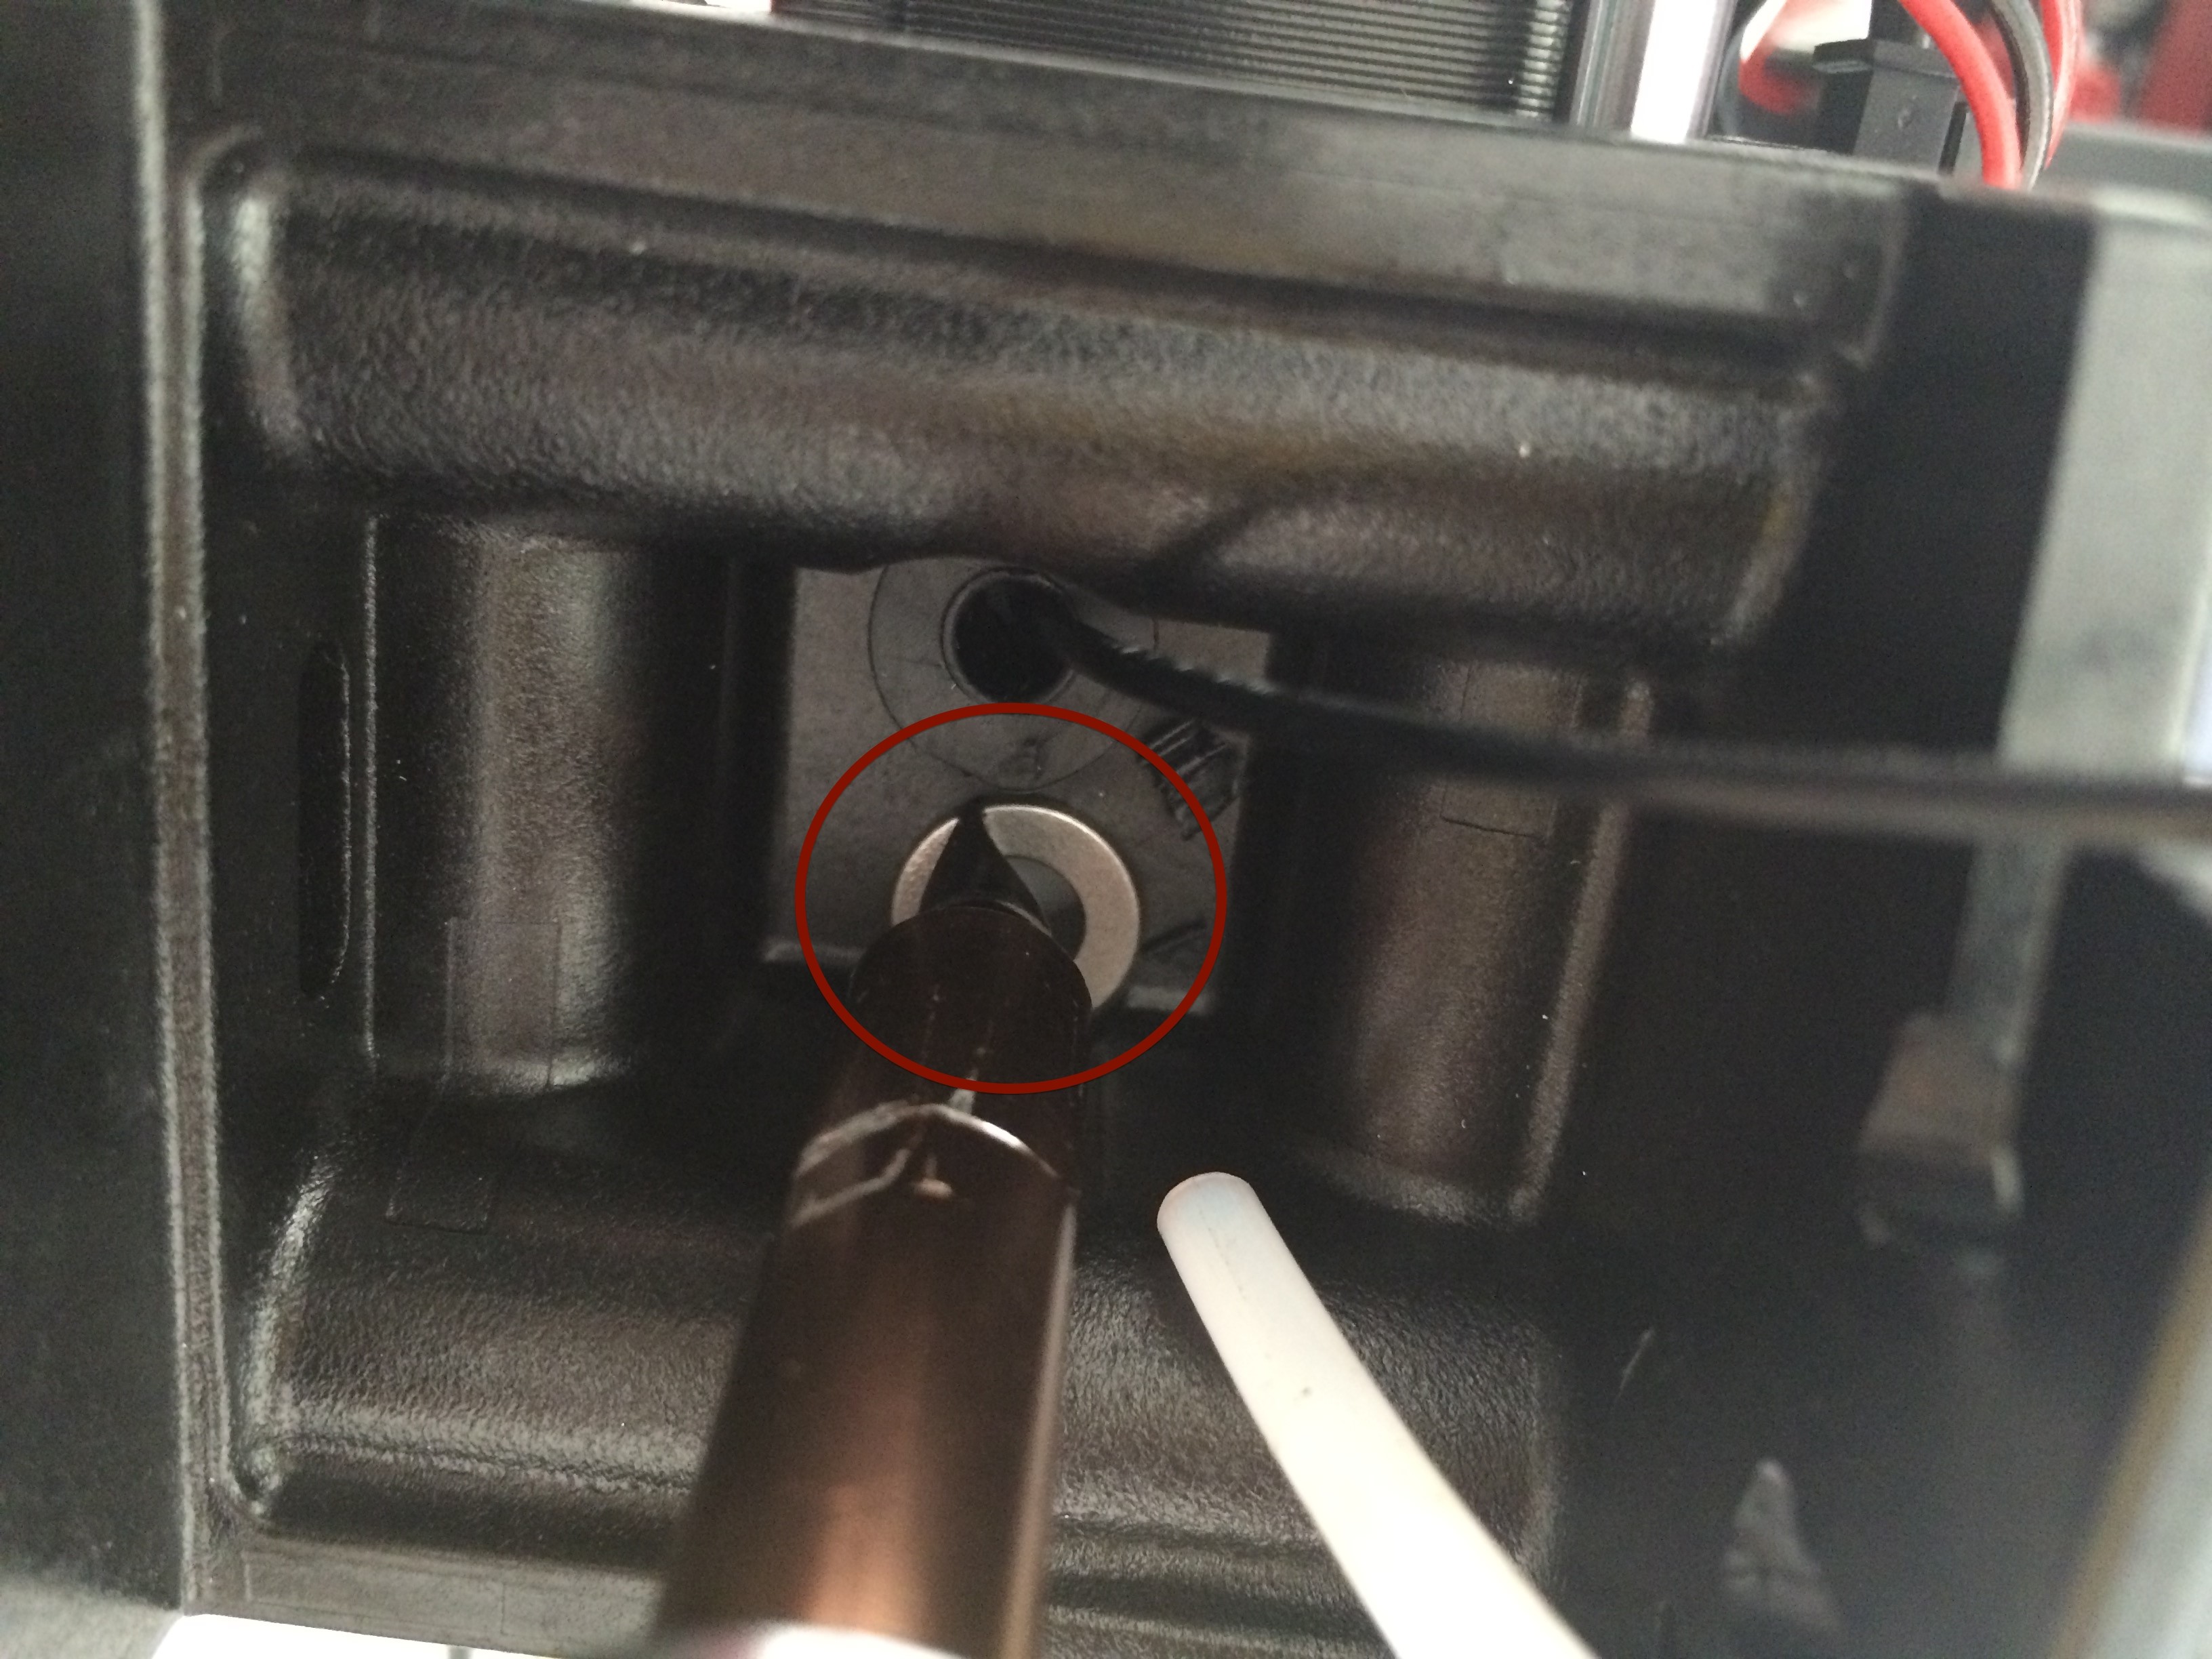
5. From top; push down teflon housing retainer

6. Remove teflon tube while holding down the housing retainer


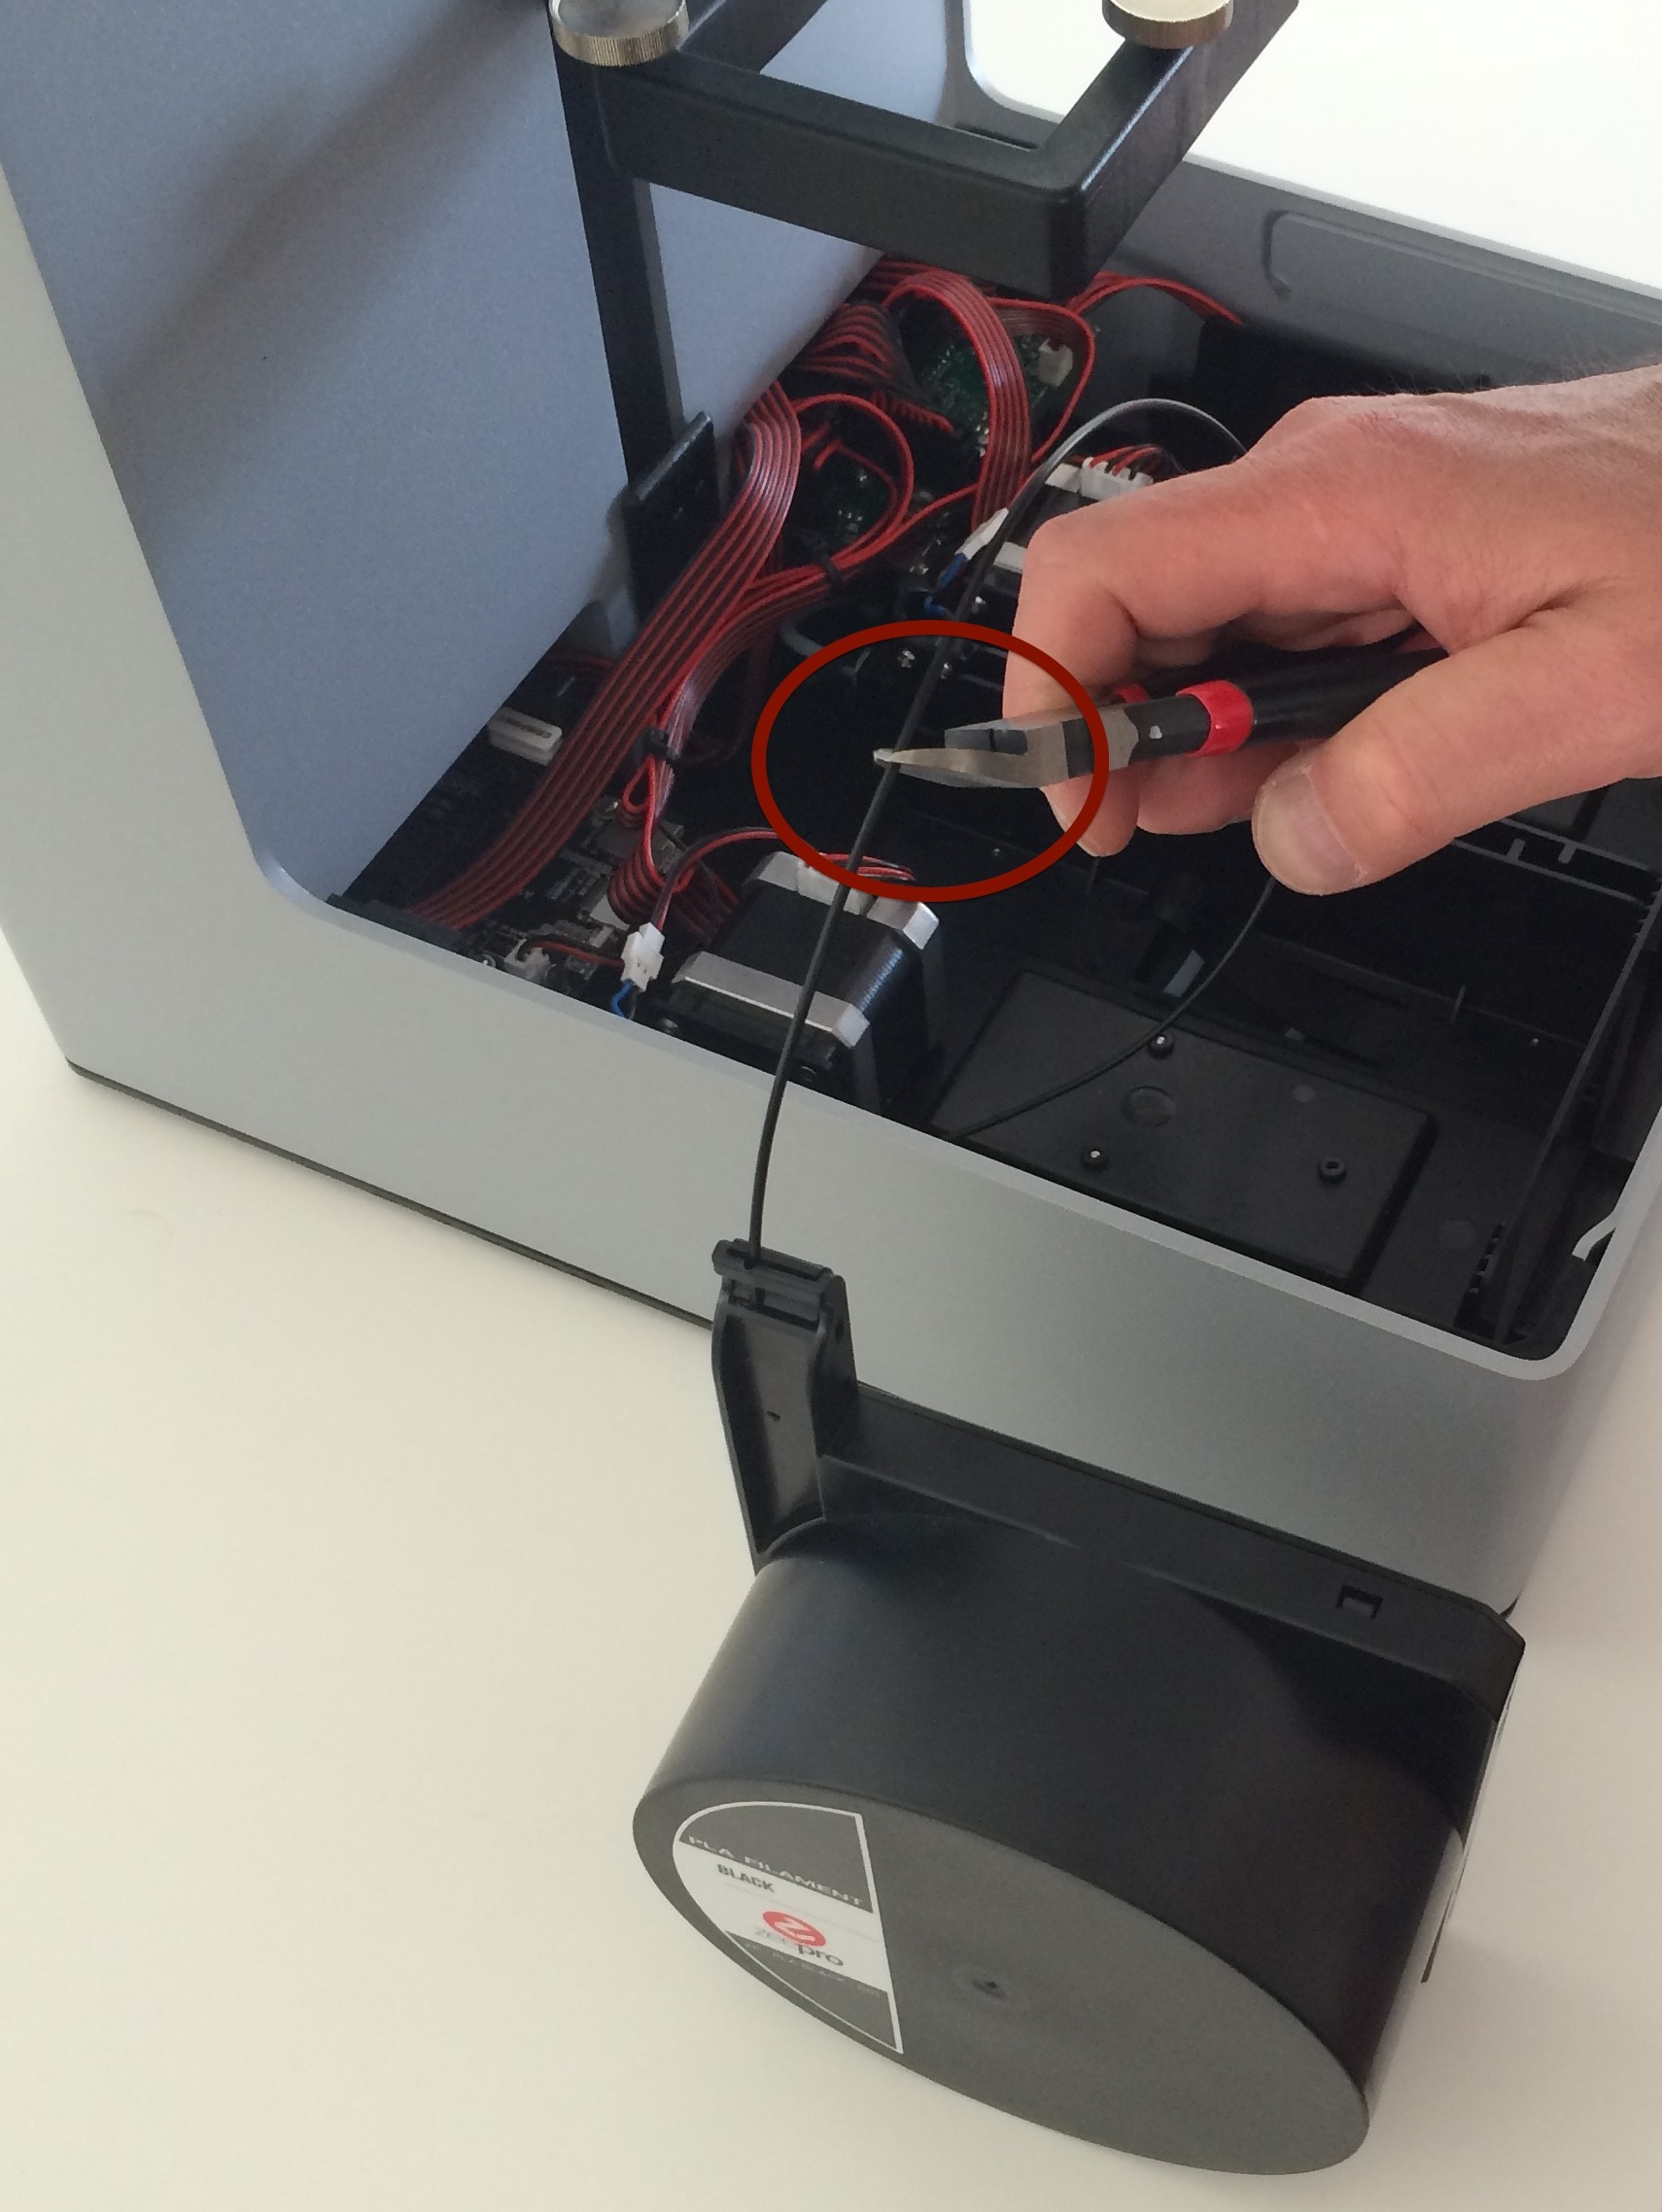
7. Pull out filament from tube

8. Cut excessive filament

9. (after cutting)

10. Remove 2 screws on the back of the cover

11. Remove 2 screws from front

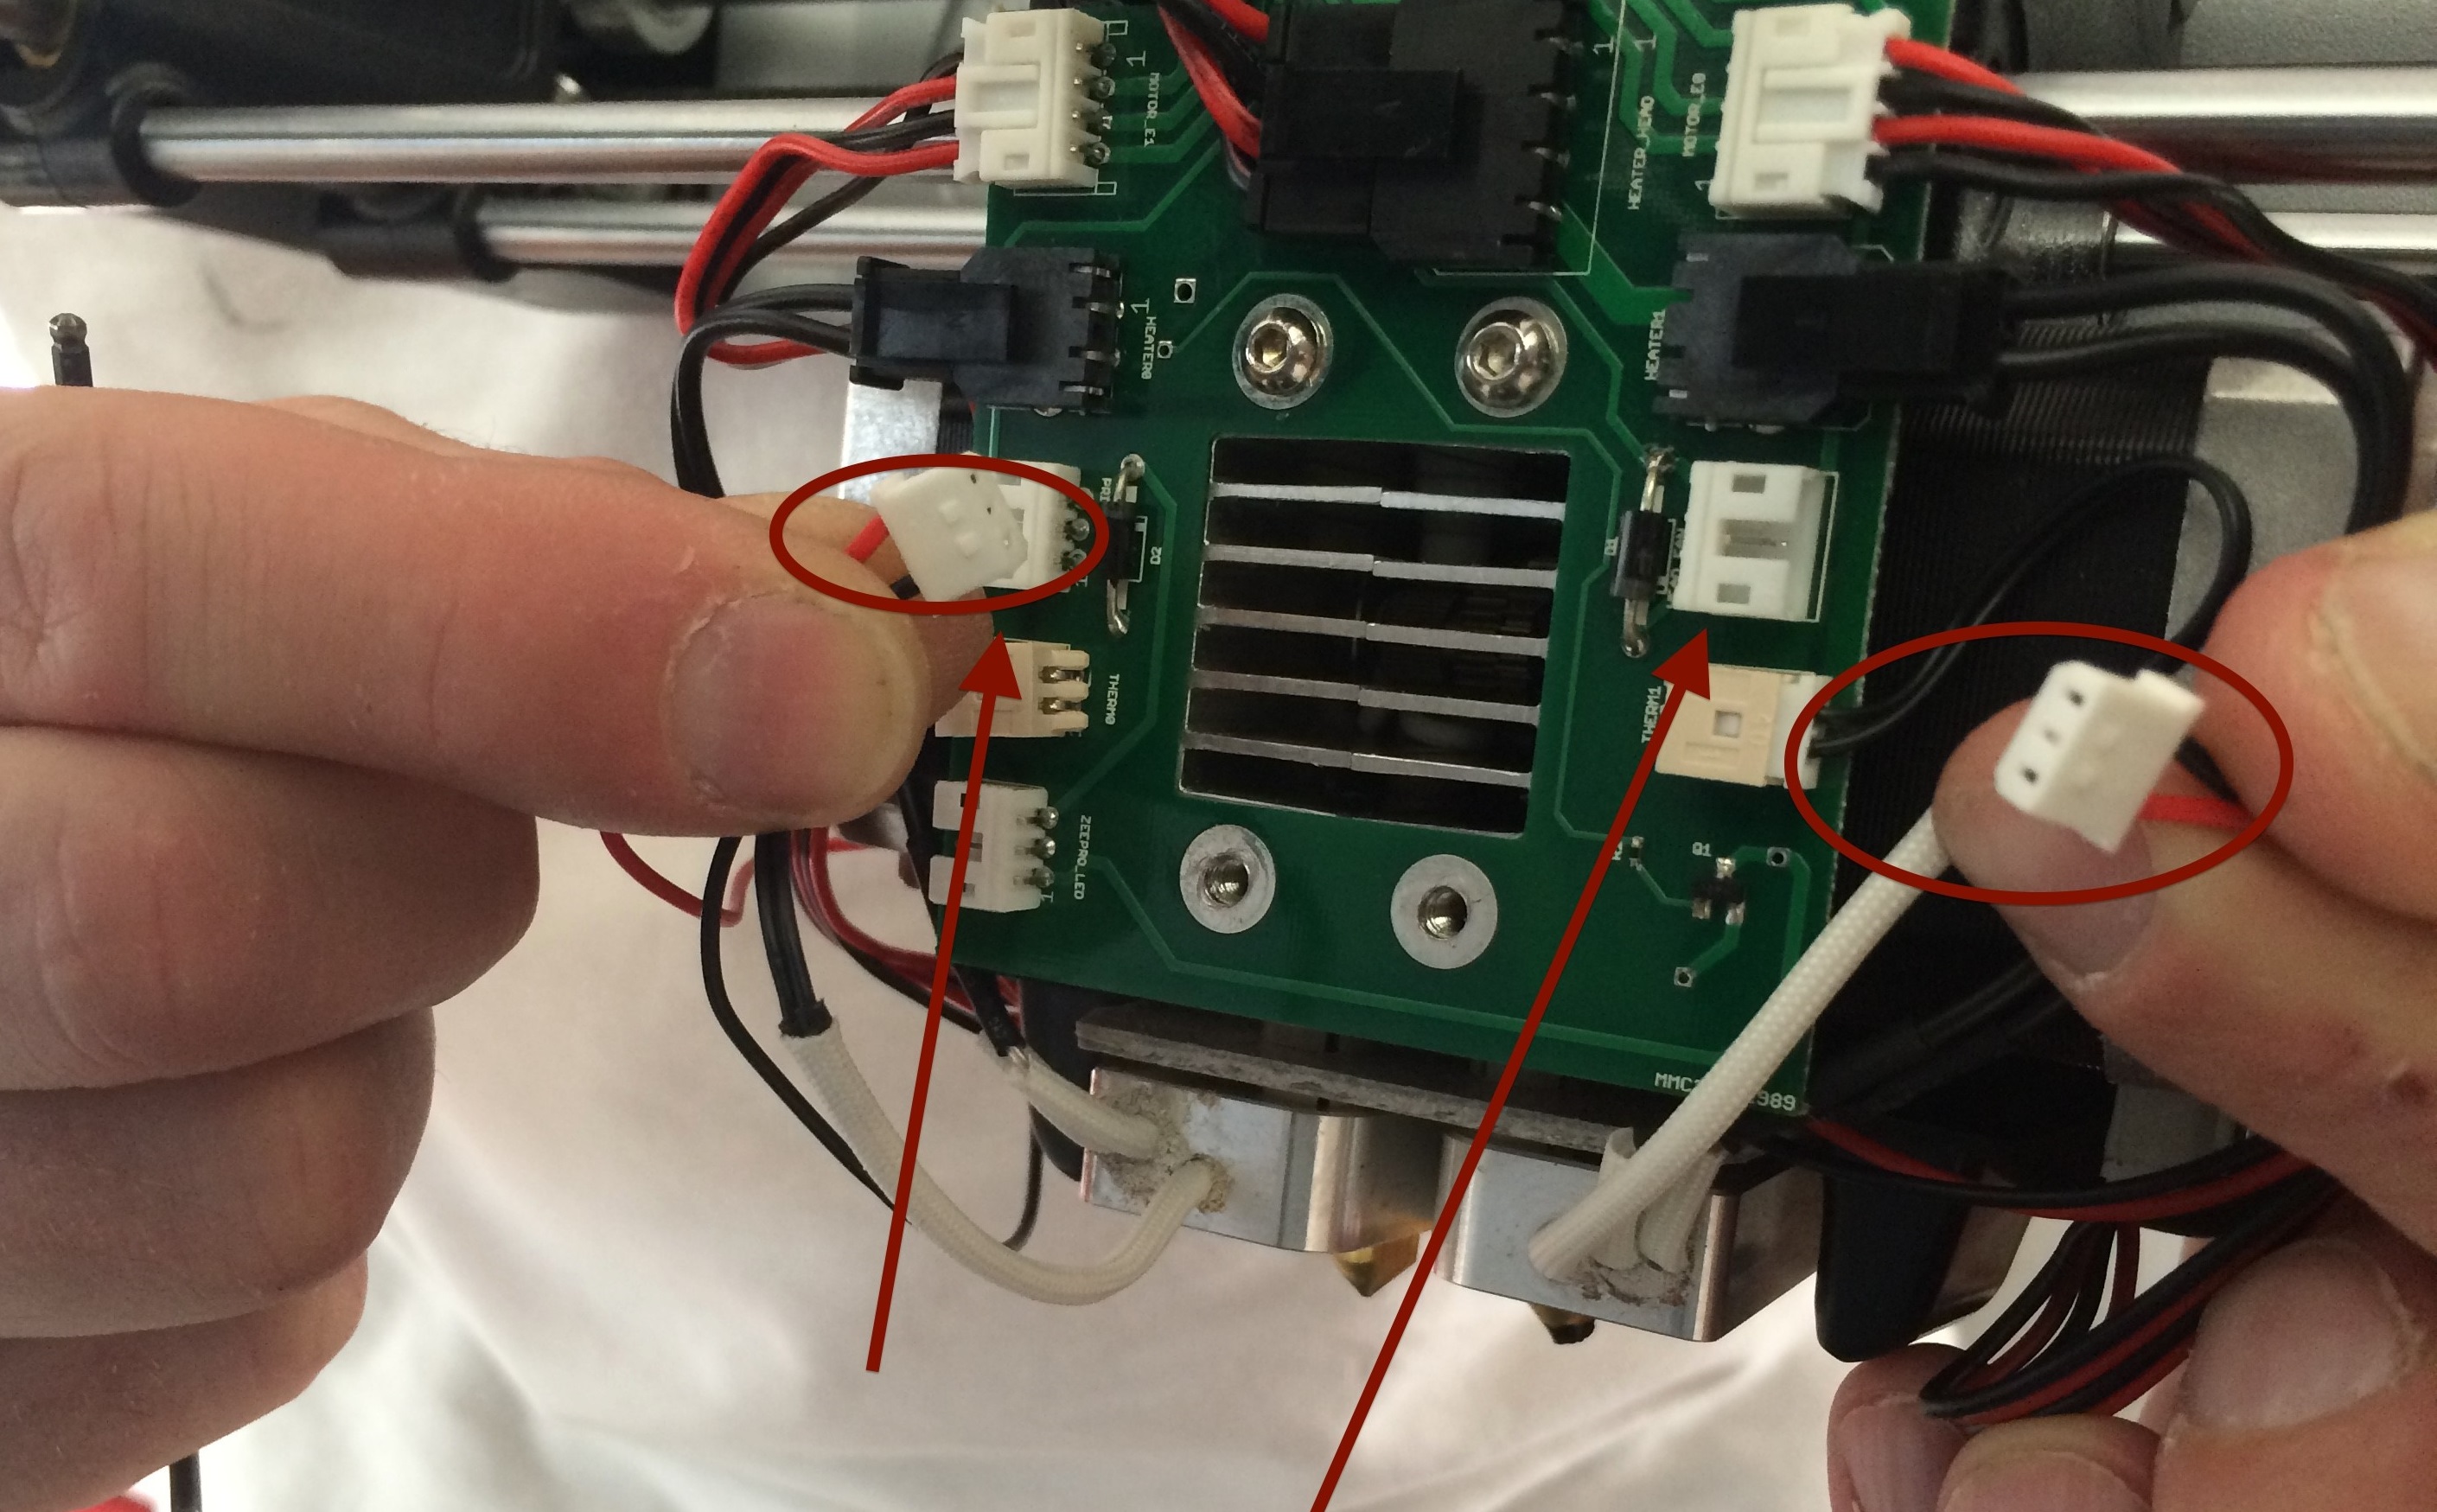
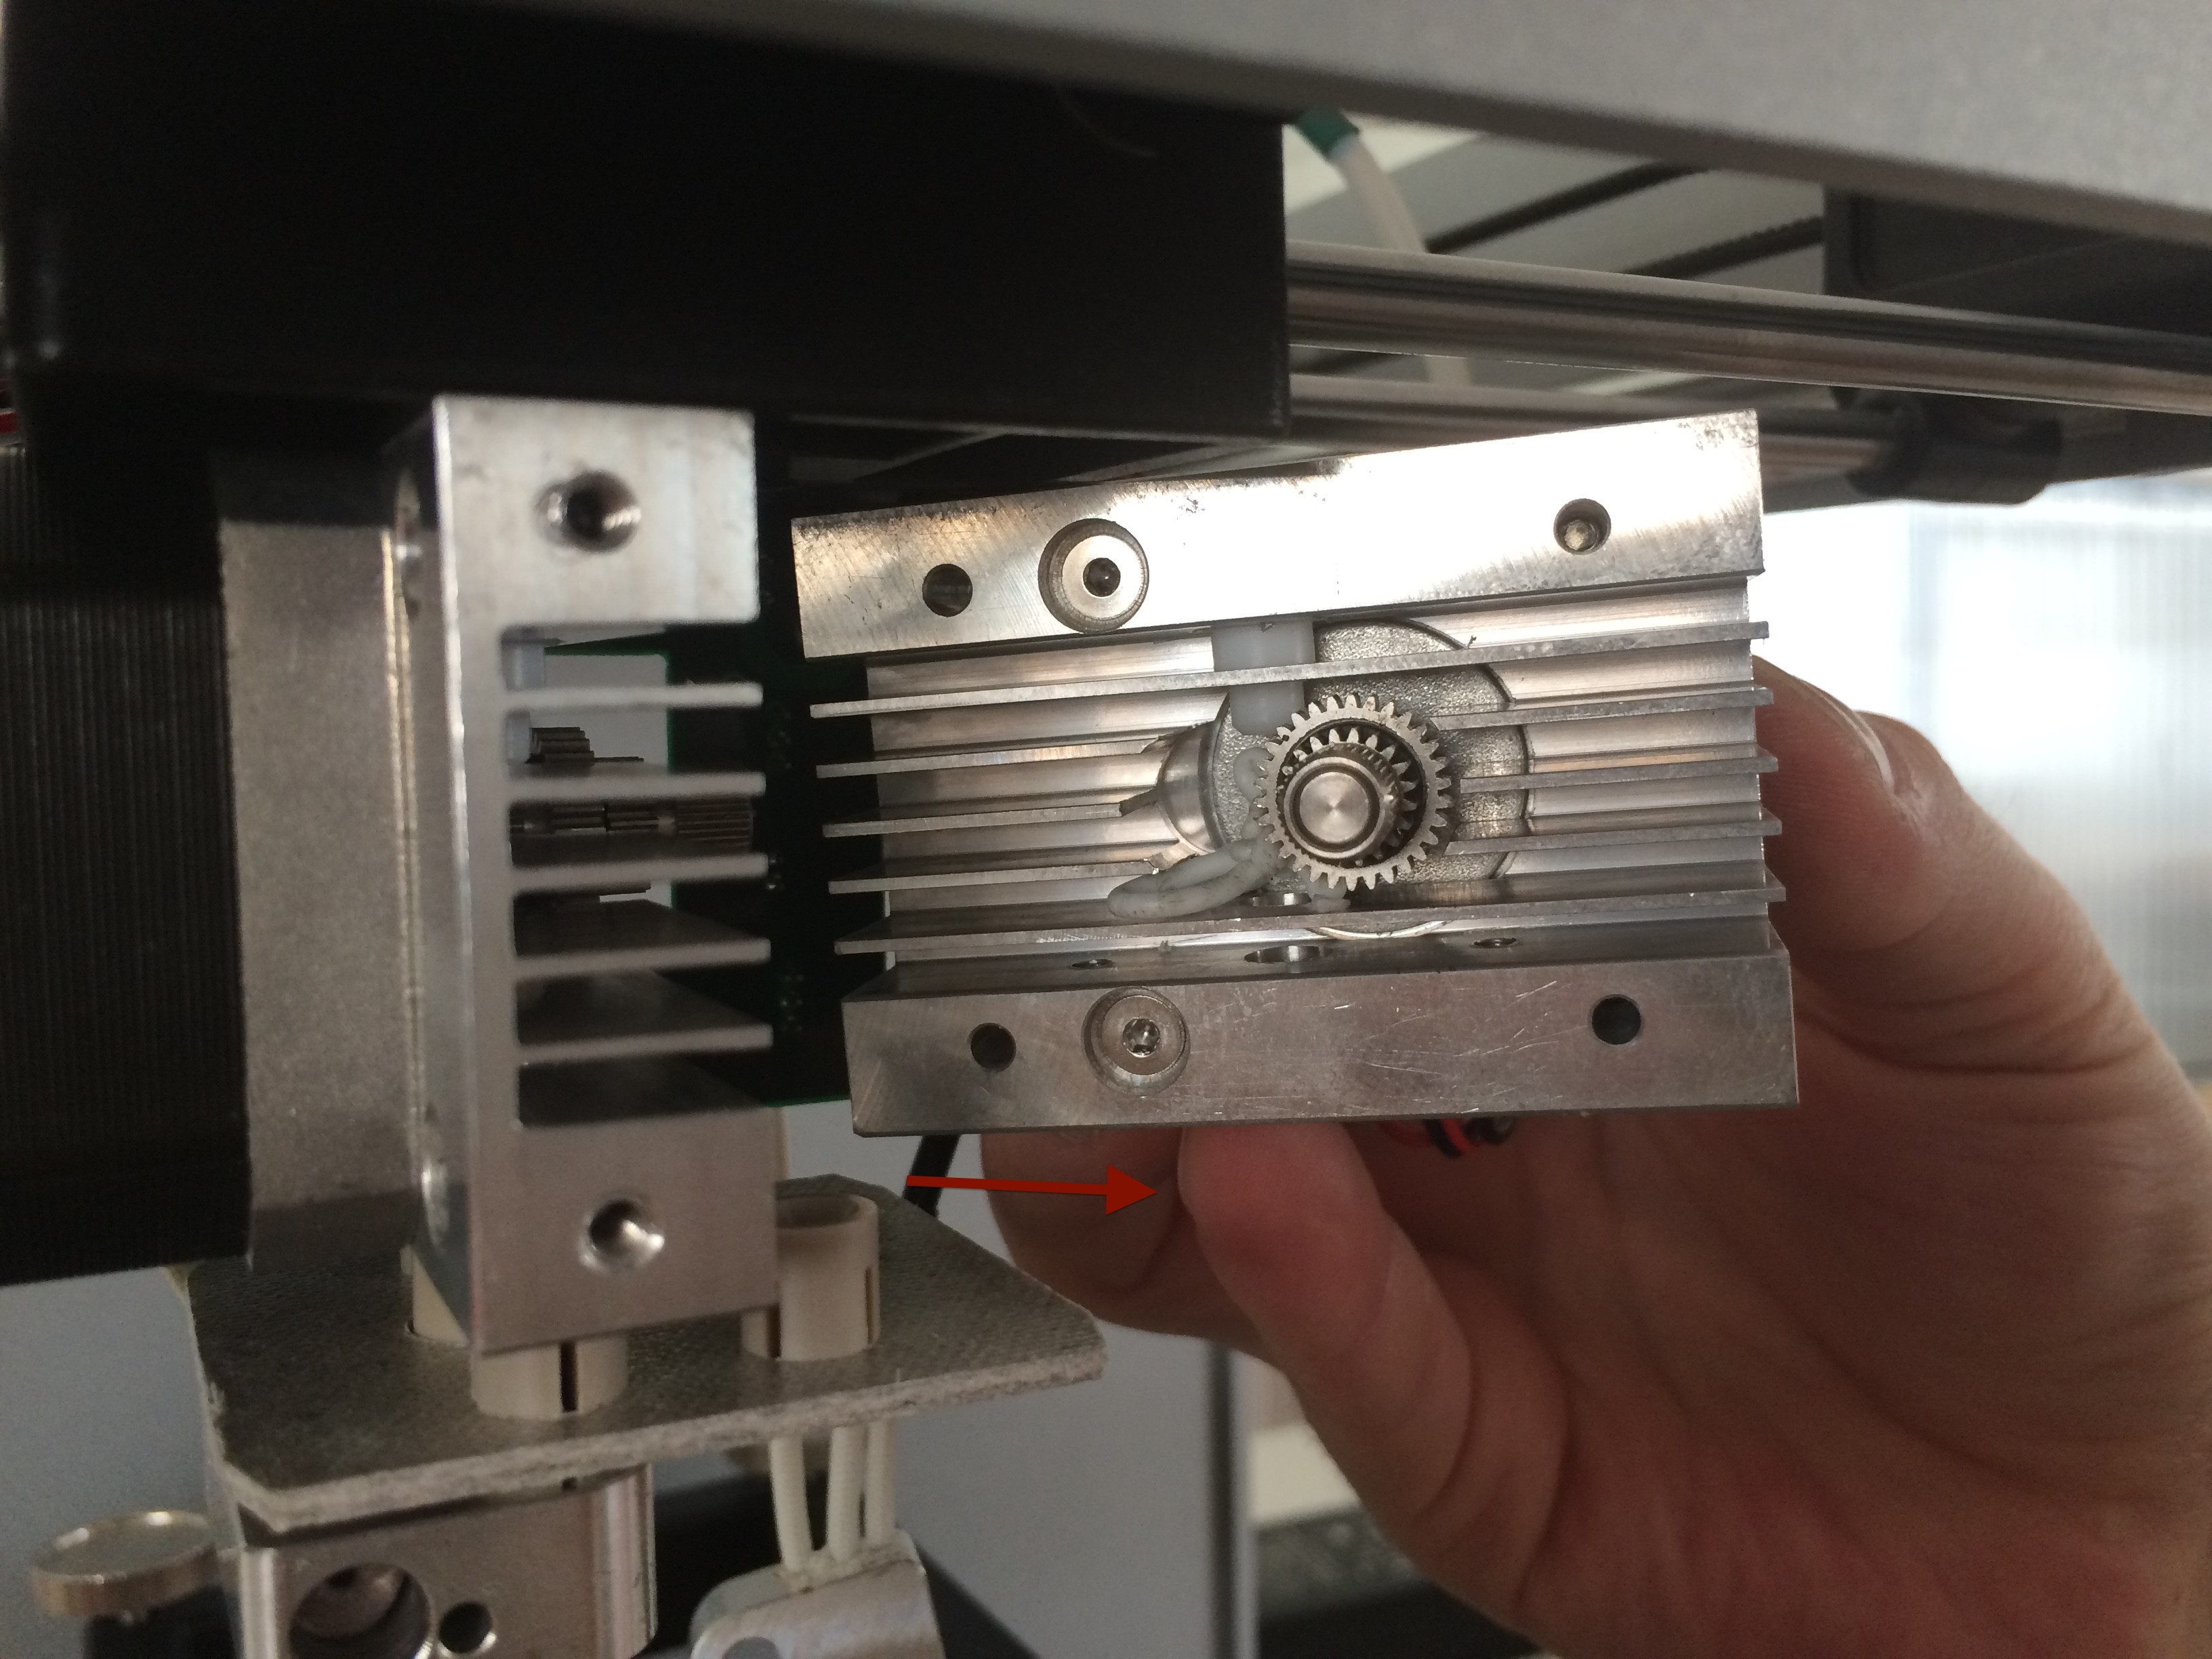
12. Remove 2 fan connector as shown on picture
13. Remove 4 blower holder screws
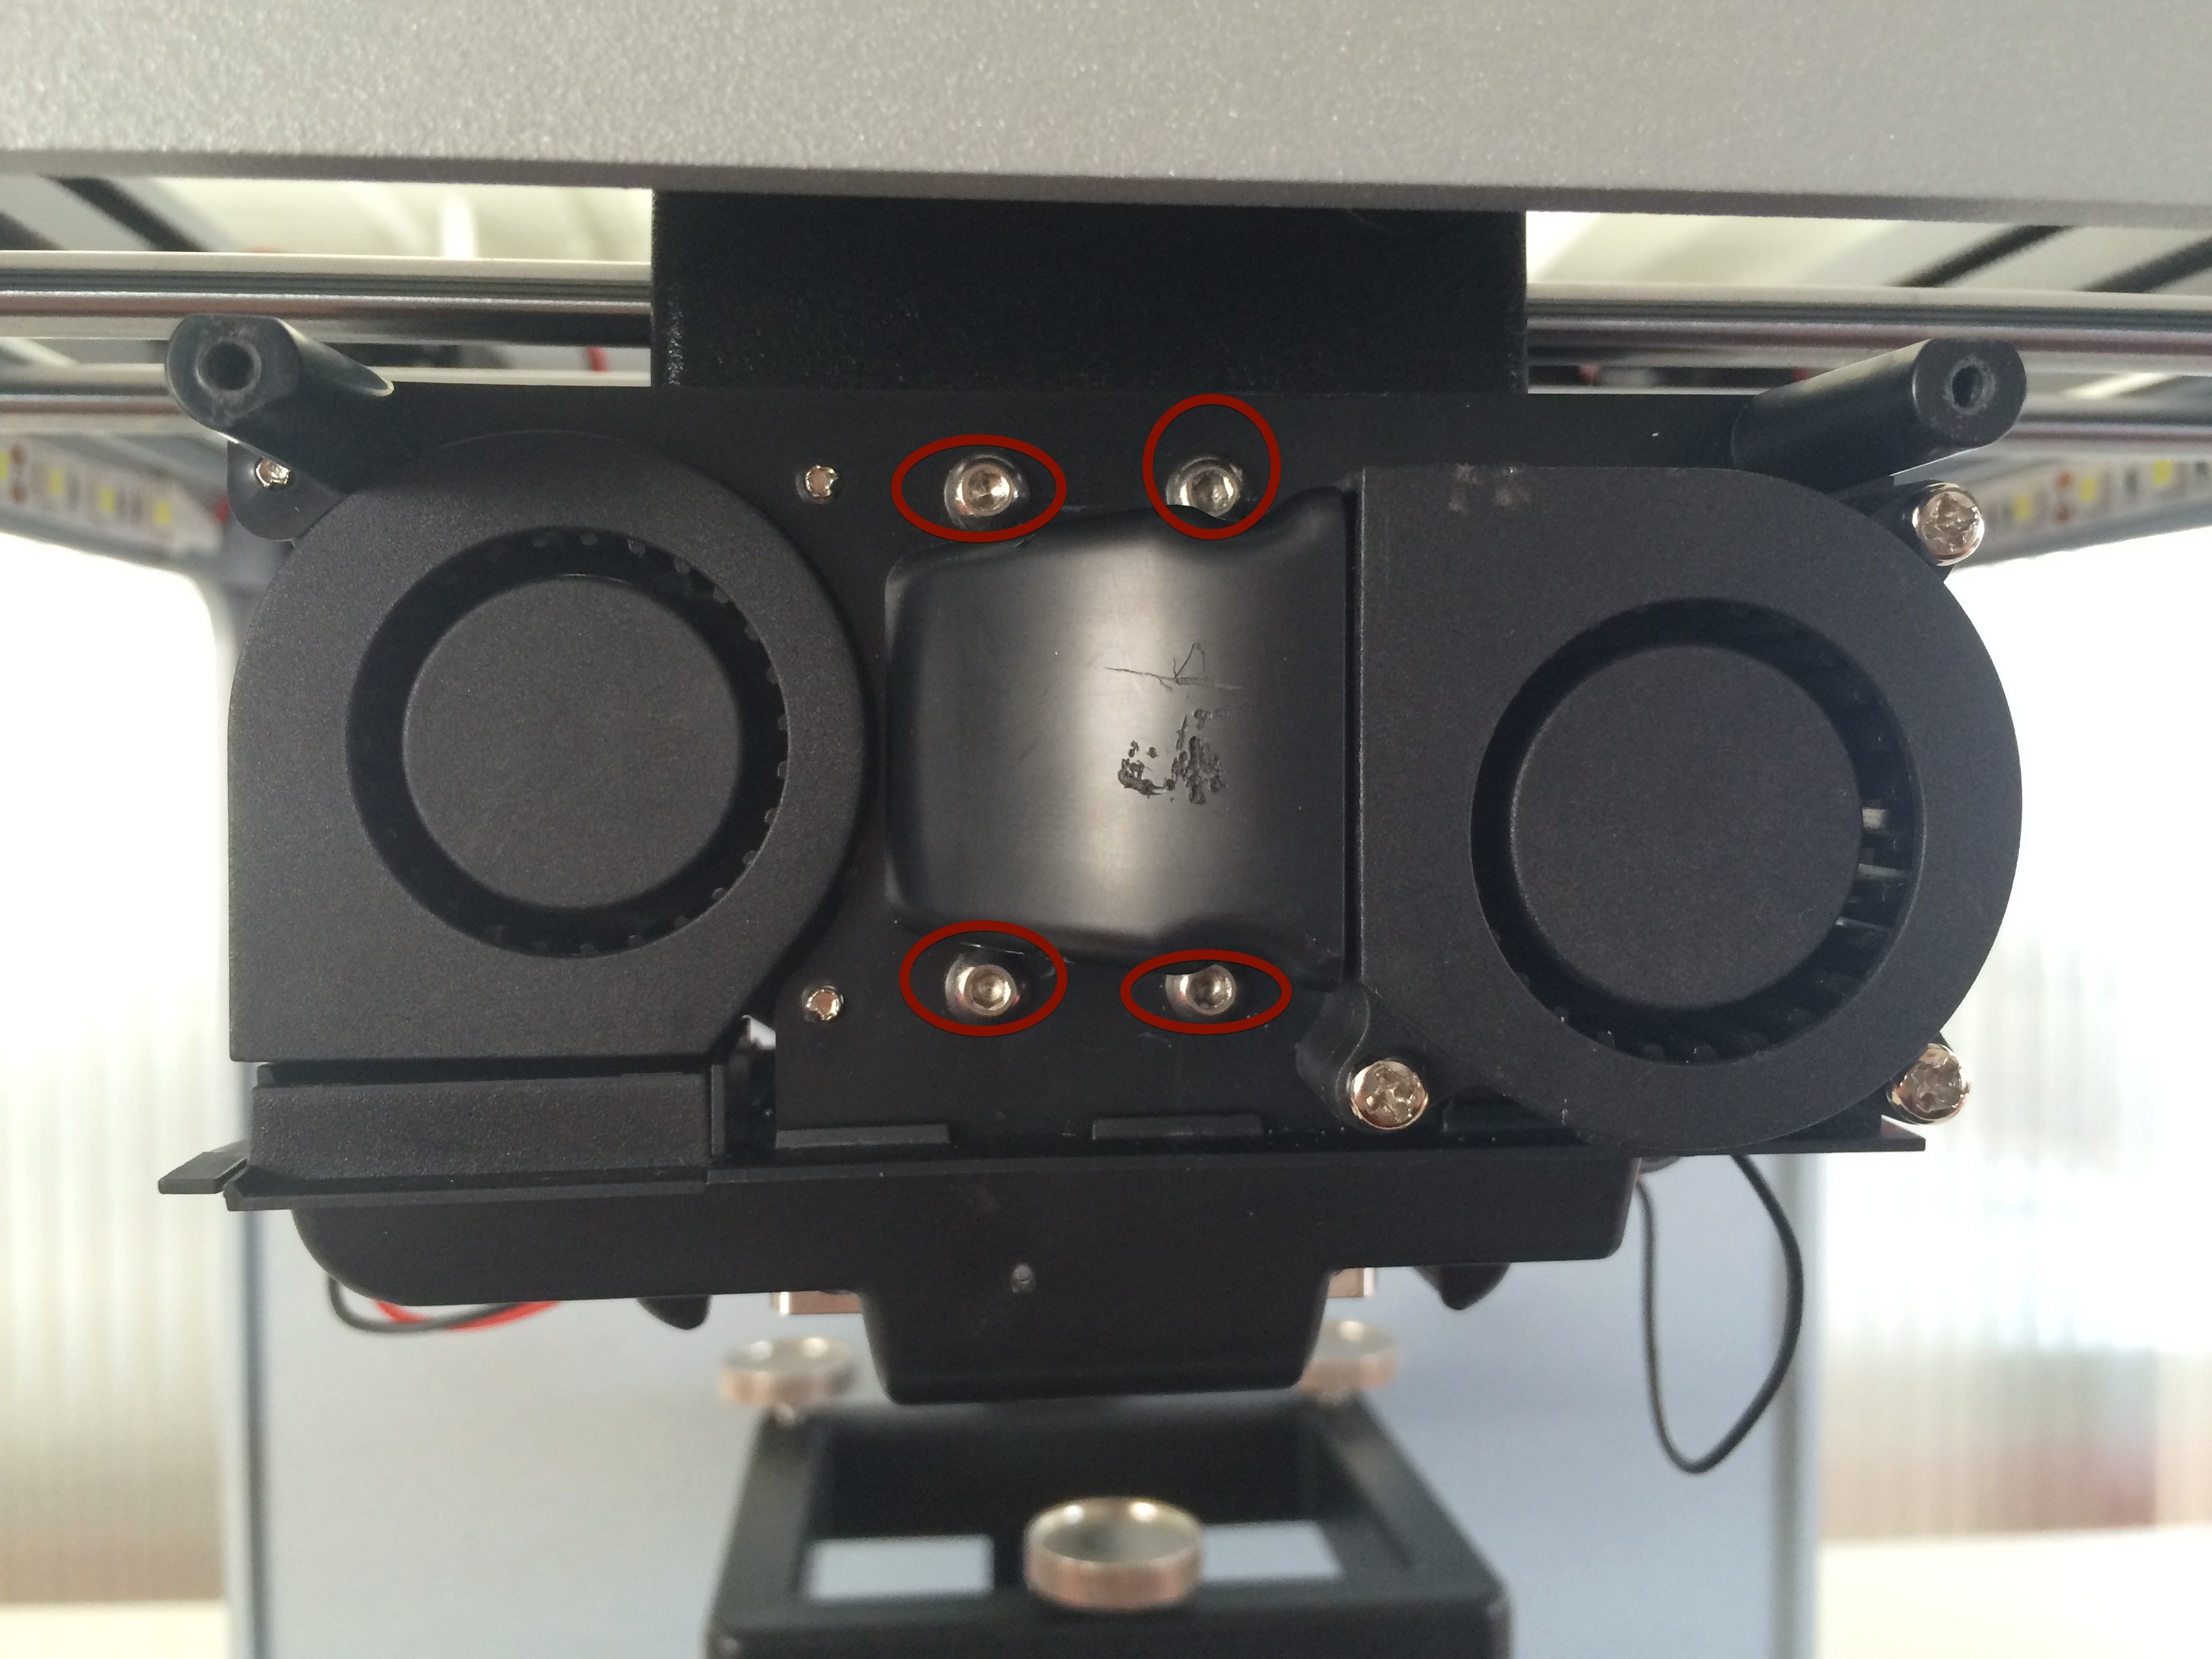
14. Remove blower holder

15. Remove housing retainer

17. Unscrew and remove head nut
18. Remove
left PCB (Printer circle board) screw (on the same side where you took off the nut)

19. Remove heater block screws

20. Remove block screws (left)

21. Remove block screws (right)

22. Remove half extruder head
23. Remove filament & reassemble via all steps reverse
